
Introduction
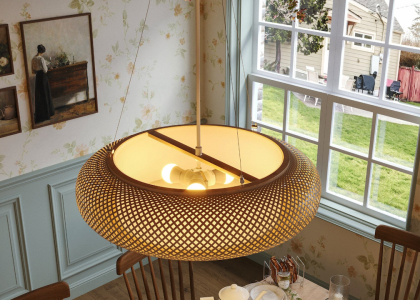
Akari lamps are an inspiration for many designers even today. The lamps were first introduced in the 1950s by Japanese-American sculptor Isamu Noguchi. These lamps are a perfect blend of traditional Japanese paper lanterns and modern minimalism. The original Akari lamps are pretty expensive and may not be affordable for many in today’s times. So why not try creating your own Akari lamp right at your home? Here’s a DIY guide to creating your very own Akari lamp!
Materials Required
Before we dive into the DIY process, let’s talk about the materials that you will require to make your Akari lamp. Here’s everything that you will need:
- Several sheets of Washi paper
- Bamboo sticks
- Saw
- Glue
- Electric cord with bulb holder
- Wire cutter
Choosing the right Washi paper
Washi paper is an important component of an Akari lamp. It is a type of Japanese paper characterized by its lightweight, durable texture, and unique feel. When choosing Washi paper, keep in mind the level of opacity, color, and texture that you desire.
Step-by-Step Guide to Making an Akari Lamp
Now that we know what materials are needed, let’s dive into the step-by-step process of making your Akari lamp.
Step 1: Preparing the bamboo sticks
Using the saw, cut the bamboo sticks into long, thin, and even strips. You will also need to cut two thicker bamboo strips to serve as the top and bottom of your lamp frame.
Step 2: Creating the Akari lamp frame
To create the frame for your lamp, connect the bamboo strips using glue. Make sure that the corners are joined together securely. Once you have positioned the frame, measure and cut the bottom bamboo stick to the desired height. Ensure that the top bamboo strip can hold the electric cord with the bulb holder.
Step 3: Cutting the Washi paper
Using the wire cutter, cut the Washi paper to fit the different sections of the bamboo frame. Ensure that the paper fits tightly by allowing a little extra room for fold-over.
Step 4: Attaching the Washi paper
Use glue to attach the Washi paper to the different sections of the bamboo frame. Ensure that the paper is attached smoothly and straight, leaving no bumps or wrinkles.
Step 5: Setting up the electric cord and bulb holder
Using the top bamboo strip, create a hole to secure the electric cord and bulb holder in place. Make sure that the wires are not touching any part of the bamboo frame.
Step 6: Placing the bulb
Screw in the bulb and place it securely in the bulb holder, ensuring that it is tightly fitted.